Than: https://3x.58voip.com/audiocodes-connect-guide/ (japanese translated by google)
In the previous article, we introduced how to configure the IP address of the Occo Gateway . After the IP is configured, it's time to access the line, and test the incoming and outgoing calls to the PBX.
First we introduce the environment:
- PBX: 3CX V16 Update 4 Linux version
- PBX IP address: 10.4.90.201
- Gateway model: Audiocodes Mediant 1000
- Gateway IP address: 10.4.90.204
Before configuration, there are two points to note. By default, Aoke gateway does not have BNC converter and RJ48 network cable. The E1 line is a BNC interface or the network cable needs to be RJ48 line sequence to be prepared in advance.
3CX side configuration
We configure the settings on the PBX side. Here we use the IP based solution. Most PBX configuration methods are similar.
Enter SIP Trunk settings and click Add SIP Trunk . The trunk configuration is as follows. After configuration, click Finish.
- Country: Select Generic
- Supplier: Select Generic SIP Trunk
- Trunk number: Enter the main number of the line

In the pop-up interface, we need to enter the following information:
- Trunk name: the display name of the trunk
- Registrar: IP address of the gateway
- Outgoing agent: optional
- Number of concurrent calls: Each E1 has 30 concurrent channels
- Authentication type: No authentication required-IP based

Finally, assign the phone assignment for commuting. The setting of this SIP Trunk is completed.
Then we need to create a new outbound rule, switch to the outbound rule interface, and click Add.
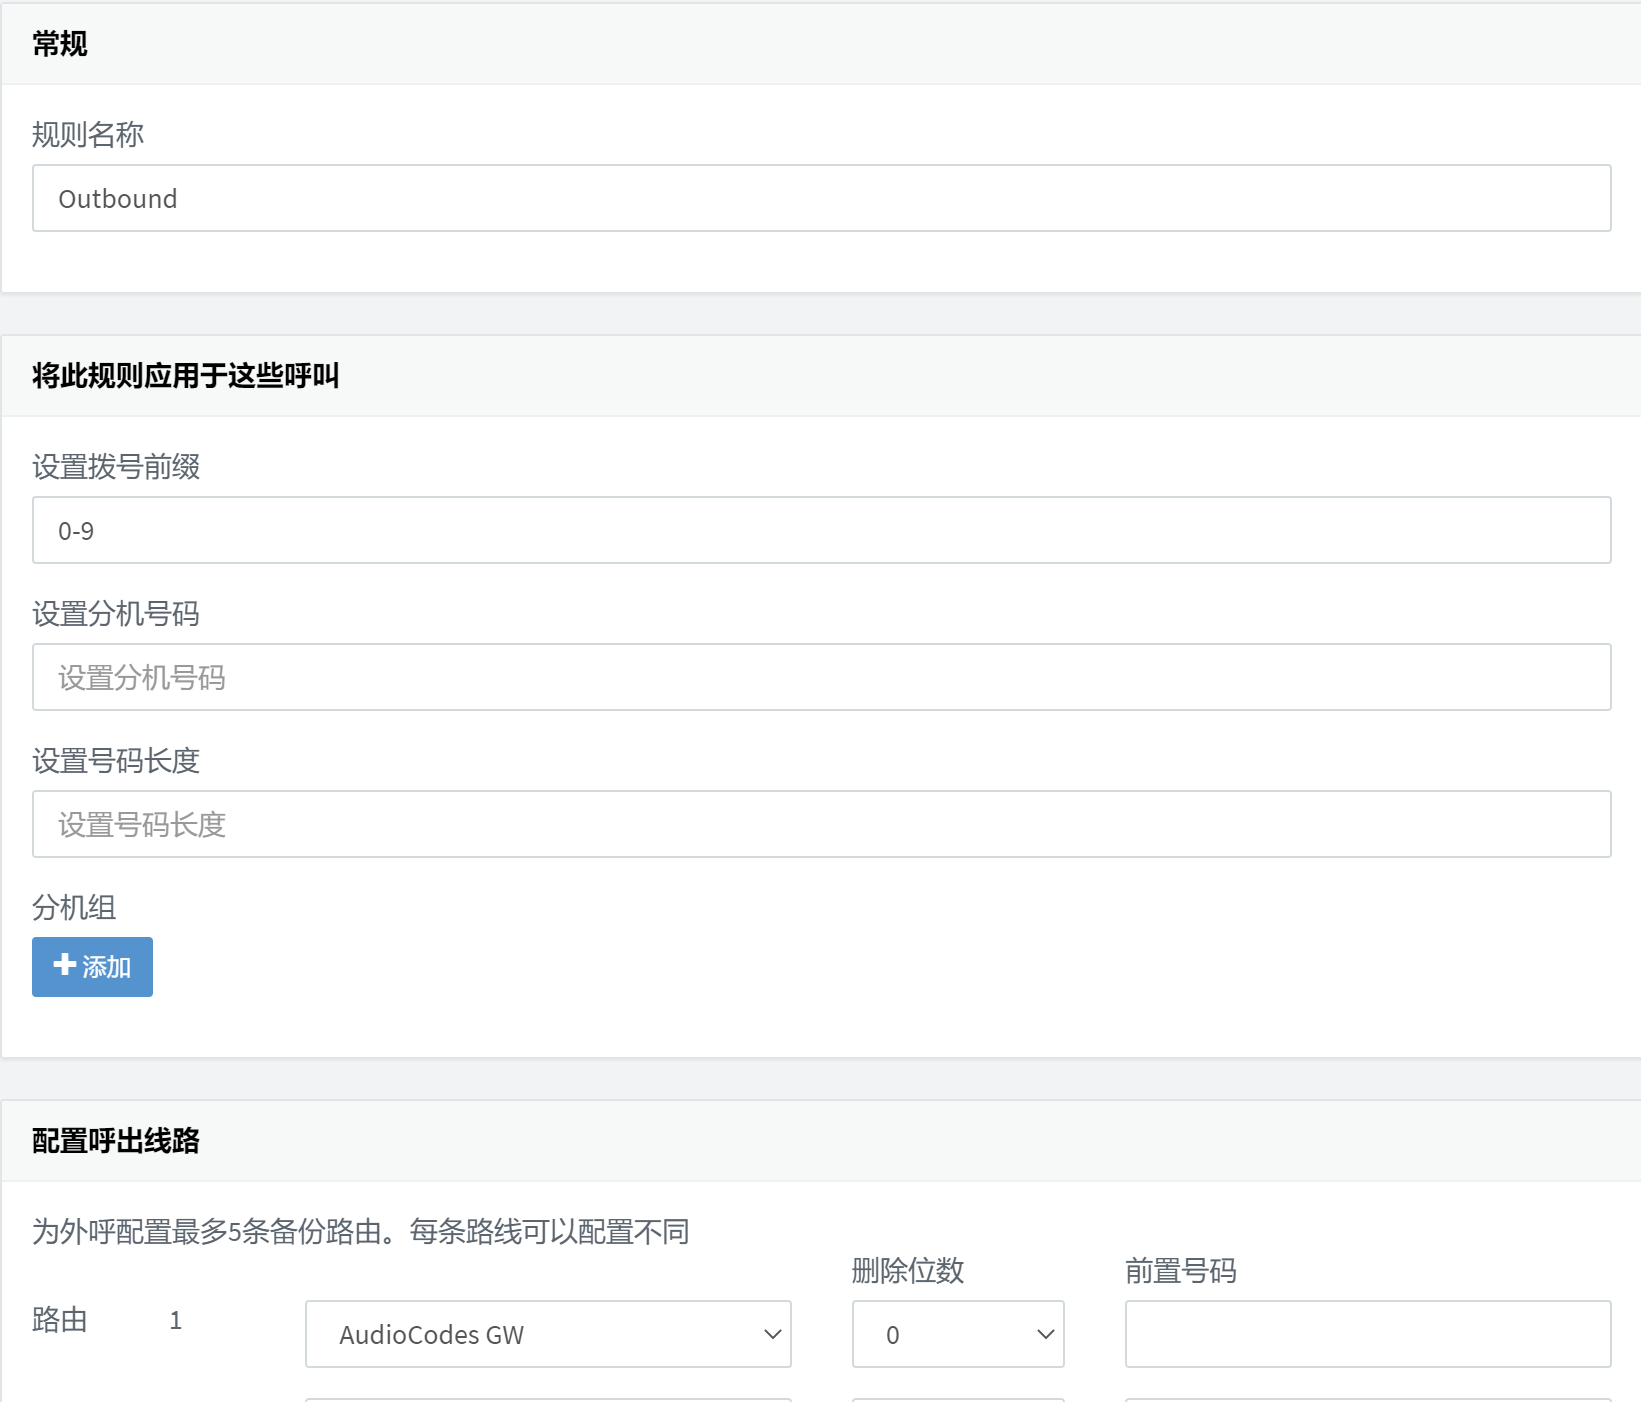
Set restrictions on outgoing calls according to your needs. Select the SIP Trunk just created at the route.
The outgoing call rules are also set.
The configuration of Aoke Gateway
After configuring 3CX, let's take a look at the gateway. We first log in to the Oko Gateway management interface.
Switch to SETUP > SIGNALING & MEDIA > GATEWAY > Trunks & Groups > Trunks .
Change Procotol Type to E1 EURO ISDN and click Apply to All Trunks.

When the Save at the top is red, click Save and then click Yes.
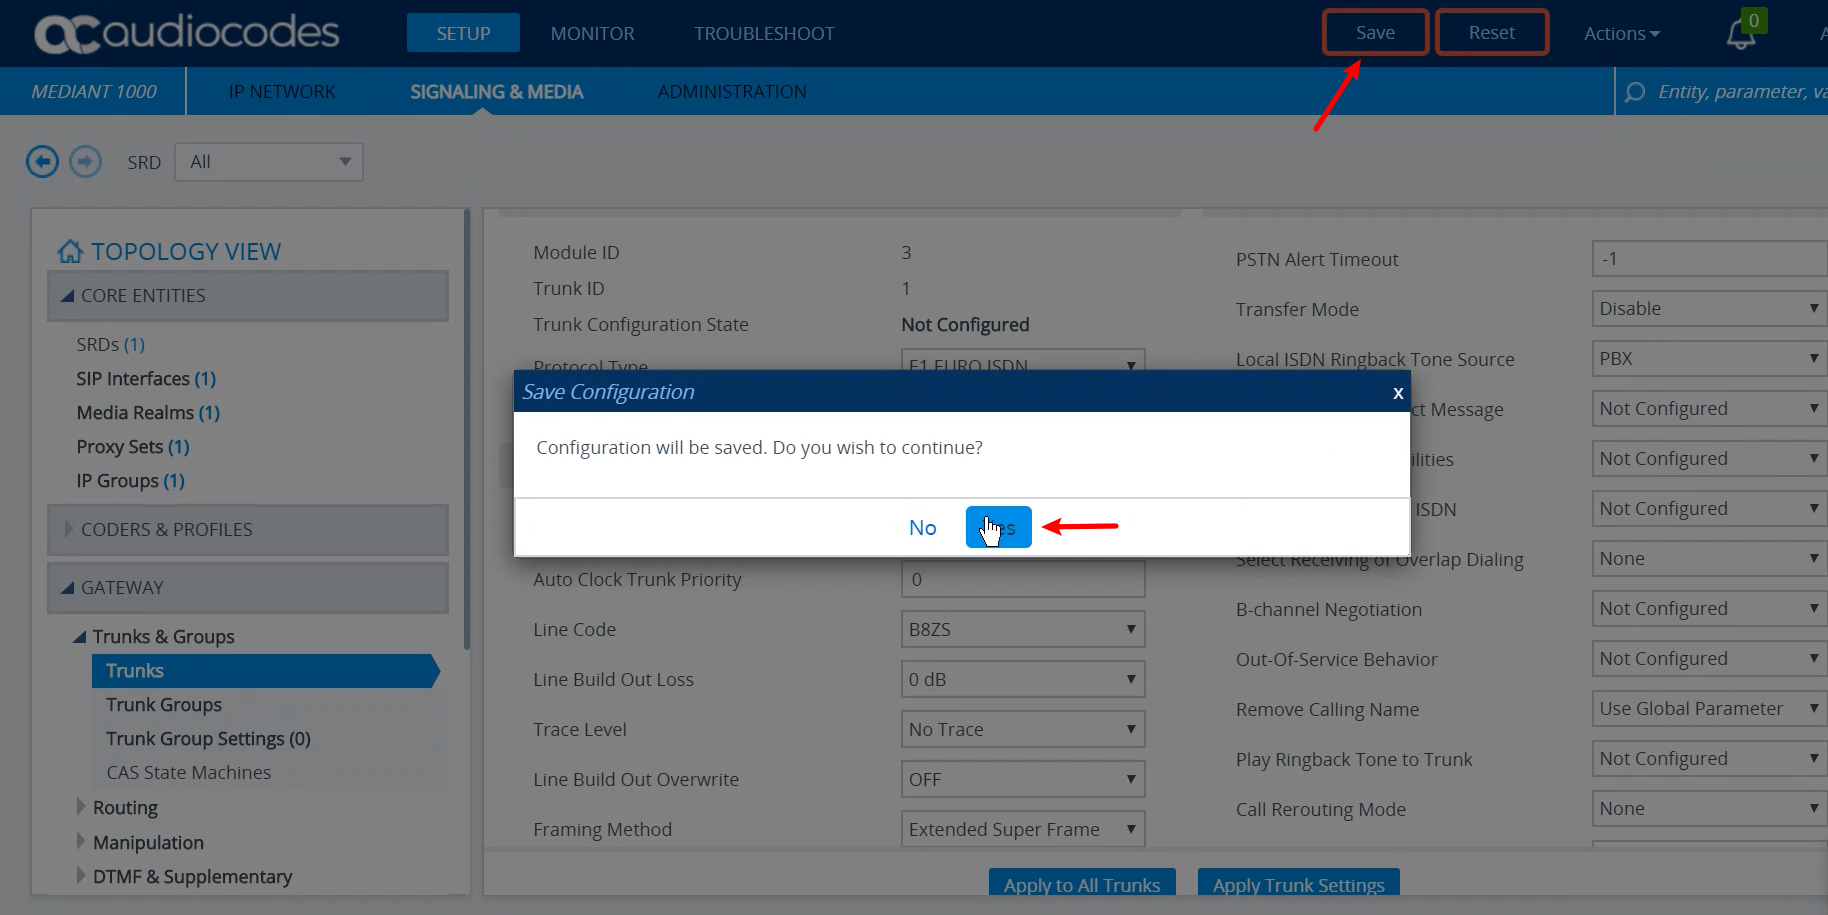
Then click Reset again, it will jump to the Maintenance Actions directory, click the Reset button of Reset Device, and click OK when the confirmation box pops up.

Next, the gateway will show that it is restarting, which takes about 4 minutes. After restarting, the web page will refresh automatically.

After the webpage refreshes, we log in to continue the operation.
Go back to the Trunks directory just now, set the Remove Calling Name option of all PRI interfaces to Enable , and click submit.

Next, switch to the Trunk Groups directory and set up groups for the trunk. The following demonstrates how to configure the 2 E1 gateway:

Click Save in the red box above and select Yes in the pop-up box.

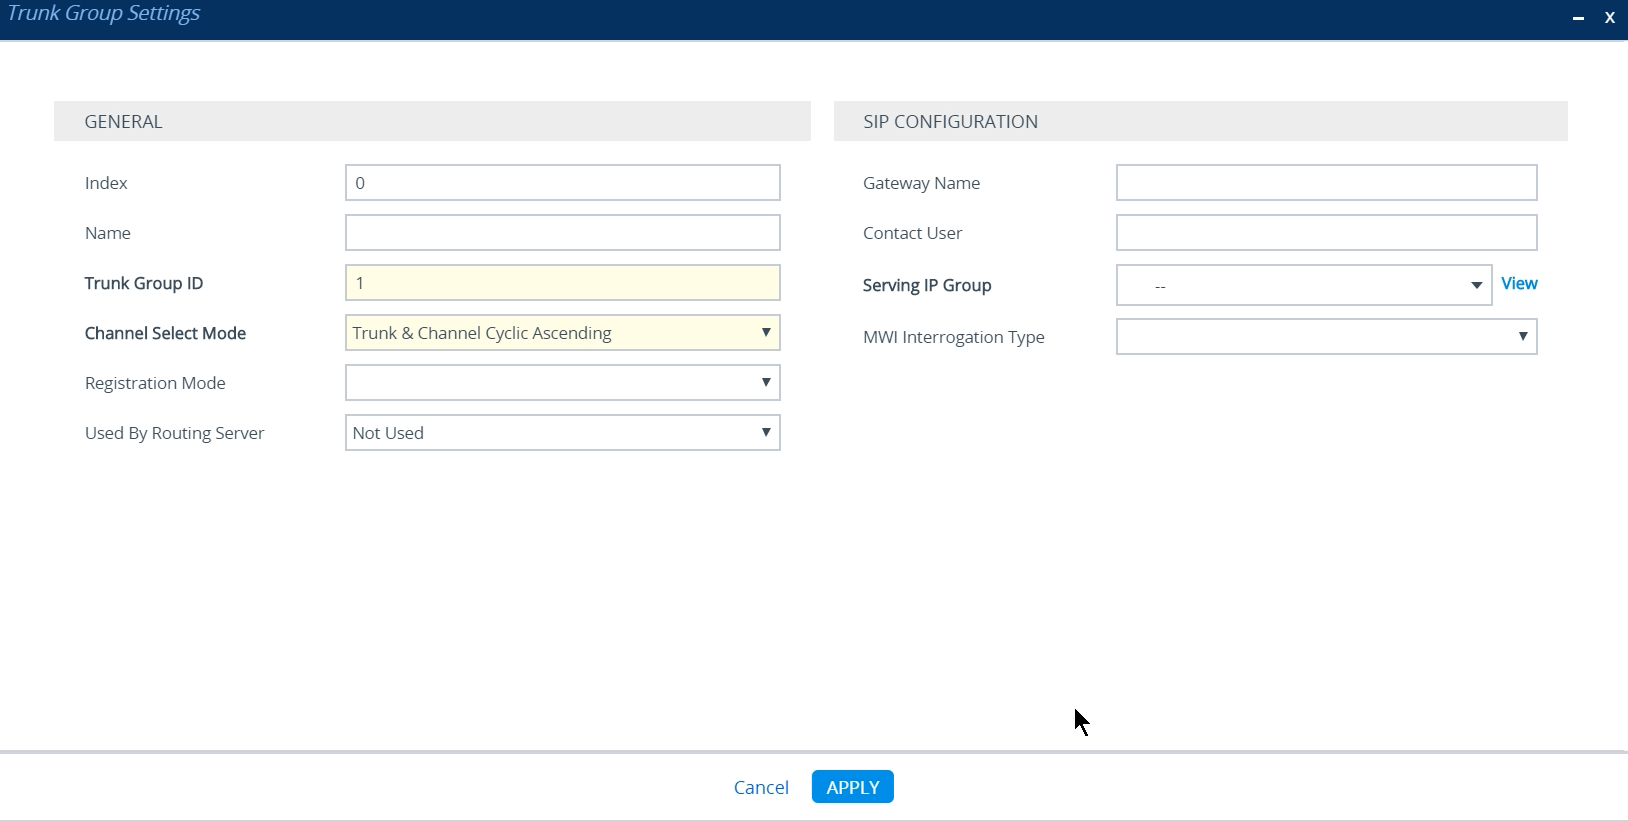
Then we modify the Trunk Group Settings and click New to create a new one.
- The Trunk Group ID is set to the ID set in the Trunk Group just now.
- Channel Select Mode is set to Trunk & Channel Cyclic Ascending.
After modifying, click Apply.
Then we switch to TDM Bus Settings and switch PCM Law Select to ALaw .
Click Save in the red box above, and select Yes in the pop-up box.

Then we reset the gateway once.

Log in to the gateway after restarting.
Then we go to the SIP DEFINITIONS > SIP Definitions General Settings directory and change the Broken Connection Mode under DISCONNECT SUPERVISION to Ignore .

Next we create a route and enter the IP -> Tel Routing directory in Routing . Click New to create a new one.

Fill in the Trunk Group ID, here is 1.
Then we also create a new rule in Tel -> IP Routing .

The following items need to be modified here:
- SIP Interface: Select SIP Interface
- Destination IP Address: IP address of 3CX
- Destination Port: SIP port of 3CX
- Transport Type: SIP transport protocol
After modification, click Apply to save.
Next click the Save red box at the top.
Finally, modify the time at TIME & DATE in ADMINISTRATION to avoid errors due to time problems.

After modifying the settings, you still need to click Save at the top to save the settings.
So far, the configuration of PBX and gateway is over. You can test whether the incoming and outgoing calls are normal.
Questa risposta ti è stata utile?
Fantastico!
Grazie per il tuo feedback
Siamo spiacenti di non poterti essere di aiuto
Grazie per il tuo feedback
Feedback inviato
Apprezziamo il tuo sforzo e cercheremo di correggere l’articolo